Monthly Archives: September 2016

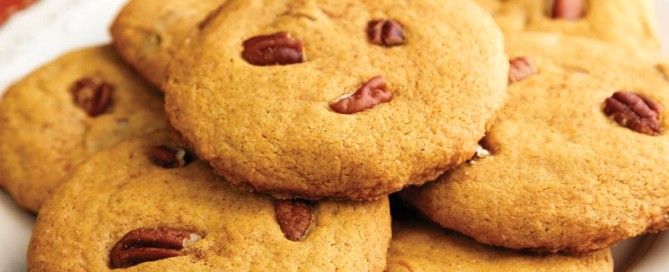
Pumpkin Pie Cookies

These cookies pack all the flavors of a holiday pumpkin pie, with only 100 calories per cookie. They are crispy on the outside, tender on the inside, and are studded with chopped pecans for great texture and flavor. Just be sure to buy 100% pure canned pumpkin and not “pumpkin pie filling,” which is already sweetened and seasoned.

Pumpkin Pie Cookies
 
Prep time
Cook time
Total time
 
Author:
Recipe type: Holiday Favorites
Makes: 36 Cookies or 18 Dessert portions
Ingredients
  • Nonstick cooking spray
  • 2 ½ cups all-purpose flour
  • 2 teaspoons pumpkin pie spice
  • 1 teaspoon baking soda
  • ¼ teaspoon salt
  • 1 ½ cups sugar
  • ½ cup (1 stick) butter, softened
  • 1 cup pure canned pumpkin
  • 1 ¼ teaspoons vanilla extract
  • ½ cup chopped pecans
Directions
  1. Preheat oven to 350°F, and spray 3 cookie sheets with nonstick cooking spray.
  2. In a mixing bowl, stir together flour, pumpkin pie spice, baking soda, and salt.
  3. In a separate mixing bowl or electric mixer, cream together the sugar and butter. Stir in pumpkin and vanilla extract.
  4. Add the dry ingredients into the wet ingredients, folding until all is combined into dough. Fold the chopped pecans into the dough.
  5. Drop tablespoons of the dough onto the prepared cookie sheets, at least 2 ½ inches apart, and press down to flatten. You should have enough dough to make 3 dozen cookies.
  6. Bake each sheet of cookies for 15 minutes, or until edges are golden brown and firm to the touch. Let cool at least 10 minutes before serving.
Perfect Portion Pumpkin Pie Cookies

HELPFUL TIP: For the most even cooking, it is best to bake these in 3 batches, rather than filling your oven racks all at once, as that limits the flow of hot air.
Serving size: 1 cookie Calories: 100

 [/fusion_builder_column][/fusion_builder_row][/fusion_builder_container]

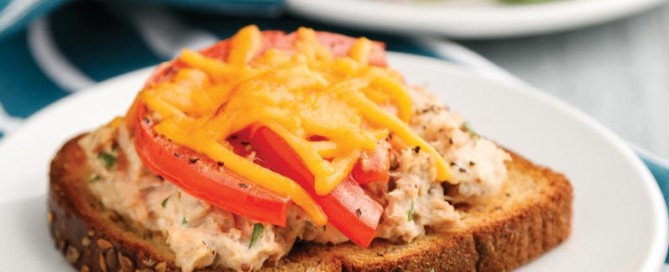
Open-Faced Tuna Melts

This diner classic is served open-faced to not only keep the calories down to a mere 200 per sandwich, but it also allows you to easily melt the cheese under the broiler. We top our Tuna Melts with sliced tomatoes for a hint of fresh flavor and contrasting texture, but don’t forget the knife and fork!

Open-Faced Tuna Melts
 
Prep time
Cook time
Total time
 
Author:
Recipe type: Soups, Salads & Sandwiches
Makes: 4 Lunch portions
Ingredients
  • 3 tablespoons light mayonnaise*
  • 2 tablespoons minced yellow onion
  • 2 teaspoons whole-grain mustard
  • 2 teaspoons chopped fresh parsley
  • 1 teaspoon lemon juice
  • ¼ teaspoon salt
  • ¼ teaspoon pepper
  • 2 (5-ounce) cans chunk light tuna, drained
  • 4 slices light wheat bread (see tip)
  • 2 tomatoes, sliced
  • ½ cup shredded sharp Cheddar cheese
Directions
  1. Add the light mayonnaise, onion, mustard, parsley, lemon juice, salt, and pepper to a mixing bowl, and stir to combine.
  2. Add the tuna to the mixing bowl, and gently fold into the dressing to create the tuna salad.
  3. Toast the wheat bread until golden brown. Transfer the toasted bread to a sheet pan.
  4. Place the oven rack in the second highest position, and set the broiler to high.
  5. Top each slice of toast with ¼ of the tuna salad. Arrange slices from ½ of a tomato over the top of the salad on each sandwich. Sprinkle the tomatoes with additional salt and pepper to season, if desired.
  6. Sprinkle the shredded cheese evenly over the top of each sandwich.
  7. Broil for just 3–5 minutes, or until cheese has melted and begins to brown.
*Natural and organic light mayonnaise are in most supermarkets and are made with all natural ingredients.


Perfect Portion Tuna Melt

HELPFUL TIP: Light bread is sold in loaves in the normal bread aisle. It usually contains only 45 calories (or less) per slice and far more fiber than ordinary bread.
Serving size: ½ tuna melt Calories: 100

 [/fusion_builder_column][/fusion_builder_row][/fusion_builder_container]
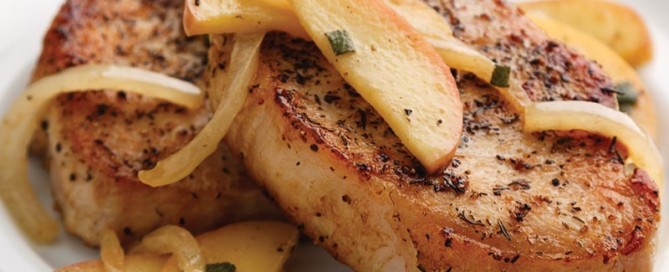
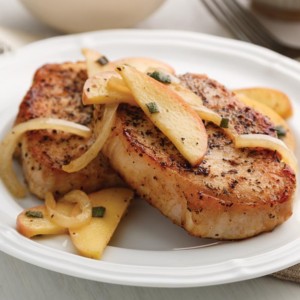
Pork Chops with Apples & Onions

Apples are a pork chop’s best friend, and everybody knows it. Though most people have served pork chops with applesauce at some point, large, tender slices of sautéed apple are an even better addition. Caramelized onions and seasonings bring savory depth to the dish, combining with the apples to make a warm slaw you serve piled right over each pork chop. Home cooking at its finest!

Pork Chops with Apples & Onions
 
Prep time
Cook time
Total time
 
Author:
Recipe type: Everyday Meals
Makes: 4 Dinner portions
Ingredients
  • 1 tablespoon olive oil
  • 1 ½ pounds, 4–6 ounce pork loin chops
  • Salt and pepper
  • ½ teaspoon thyme
  • 1 large yellow onion, thinly sliced
  • 2 apples, cored and thinly sliced (see tip)
  • 2 tablespoons butter, divided
  • ⅓ cup chicken stock
  • 1 tablespoon light brown sugar
  • 2 teaspoons cider vinegar
  • ¼ teaspoon ground mustard
  • ⅛ teaspoon ground allspice
  • 2 tablespoons chopped fresh sage
Directions
  1. Add the olive oil to a large skillet over medium-high heat, and heat until the oil thins and coats the skillet.
  2. Generously season both sides of the pork chops with the salt, pepper, and thyme.
  3. Place the seasoned chops into the skillet, and cook for 3–4 minutes on each side, until browned, and slicing into the thickest chop reveals no pink. Remove from skillet, and cover with aluminum foil.
  4. Reduce heat to medium, and add the onion, apples, and 1 tablespoon of butter to the skillet. Sauté for 5 minutes, or until onions are lightly caramelized.
  5. Deglaze the skillet with the chicken stock, scraping any browned pork and onions from the bottom. Once deglazed, add the brown sugar, cider vinegar, mustard, and allspice. Sauté for an additional 4–5 minutes, or until apples are tender.
  6. Remove the skillet from heat, and stir in chopped sage and the remaining 1 tablespoon of butter. Return the pork chops to the skillet, and cover with the apples and onions before serving.
Pork Chops with Apple & Onions

HELPFUL TIP: It is not necessary to peel the apples in this recipe. Not only does the final dish look better with the peel on, but there are tons of nutrients contained within that peel!
Serving size: ¼ pork chop Calories: 100

 [/fusion_builder_column][/fusion_builder_row][/fusion_builder_container]

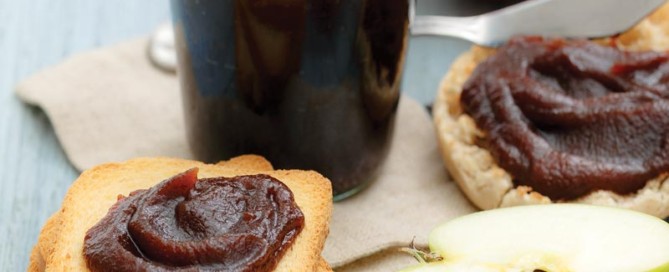
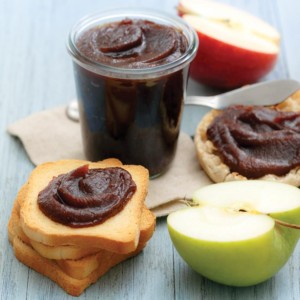
Amazing Apple Butter

We avoid the addition of sweet cider or juice by releasing the apple’s natural moisture and sugars in a slow cooker. No constant stirring or scorched pans—just set it and forget it, until the aroma fills your house that is!

Amazing Apple Butter
 
Prep time
Cook time
Total time
 
Author:
Recipe type: Dressings, Sauces & jams
Makes: 24 Spread portions
Ingredients
  • 2 ½ pounds Granny Smith apples
  • 2 ½ pounds (any variety) red apples
  • 1 cup light brown sugar
  • ½ cup sugar
  • 2 teaspoons lemon juice
  • 2 teaspoons ground cinnamon
  • 1 ½ teaspoons vanilla extract
  • 1 teaspoon ground allspice
  • ⅛ teaspoon salt
Directions
  1. Peel, core, and roughly chop all apples before placing in a slow cooker.
  2. Add all the remaining ingredients to the slow cooker, and toss to evenly coat apples.
  3. Set the cooker to low, cover, and let cook for 10 hours, stirring once after 8 hours.
  4. Use an immersion (hand) blender to purée the cooked apples until smooth. You can also do this in a traditional blender or food processor, but it may take 2–3 batches.
  5. For thicker apple butter, transfer the puréed mixture to a sauce pot over medium heat, and let simmer for 15 minutes, or until your desired consistency. Let cool for at least 30 minutes before serving. Store covered and refrigerated for up to 2 weeks.
Perfect Portion Amazing Apple Butter

HELPFUL TIP: This makes A LOT of apple butter (about 4 jars), so it is a good idea to freeze ½ of the batch, or give some of the jars as gifts. You could also pressure-seal the jars, but that is only recommended for those who are very familiar with the process.
Serving size: 3 tbsp Calories: 100

 [/fusion_builder_column][/fusion_builder_row][/fusion_builder_container]
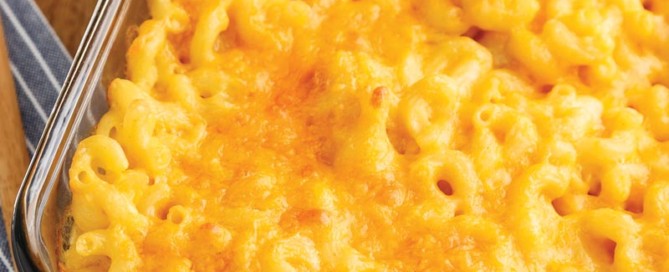
Baked Mac & Cheese

Anson’s American Treasures: As a kid, my family couldn’t always afford great meals, but there was one night each month when everything seemed perfect. There were no arguments at the table, no worries, just my mother’s amazing Baked Mac & Cheese. The fabulous recipe gurus were able to swap a little of the milk for chicken broth and sharp Cheddar cheese instead of mild to capture that great flavor I still savor. So good!

Baked Mac & Cheese
 
Prep time
Cook time
Total time
 
Author:
Recipe type: Casseroles & One-Pot Meals
Makes: 12 Lunch Portions
Ingredients
  • Nonstick cooking spray
  • 16 ounces elbow macaroni
  • 2 tablespoons butter
  • 2 tablespoons all-purpose flour
  • 2 teaspoons ground mustard
  • 1 teaspoon salt
  • ½ teaspoon white pepper
  • 2 ½ cups 2% milk
  • ½ cup chicken broth
  • 3 cups shredded sharp Cheddar cheese, divided
Directions
  1. Preheat the oven to 375°F. Spray a 13 x 9-inch baking dish with nonstick cooking spray.
  2. Boil the macaroni just until al dente. Drain and rinse under cold water.
  3. Melt the butter in a large pot over medium heat. Add the flour, ground mustard, salt, and white pepper, and stir until smooth and combined. Let cook for 2 minutes.
  4. Whisk the milk and chicken broth into the pot, and continue whisking until the sauce is smooth and free of lumps.
  5. Bring the sauce to a simmer, whisking constantly, cooking until it begins to thicken.
  6. Remove the pot from the heat, and stir in 2 ¼ cups of the Cheddar cheese, stirring until melted into the sauce. Add the cooked macaroni to the pot and stir until evenly coated with the sauce.
  7. Pour the macaroni and cheese sauce into the prepared baking dish, and spread to even out. Top with the remaining ¾ cup shredded Cheddar cheese.
  8. Bake for 30 minutes, or until cheese is bubbly and lightly browned. Let cool for at least 5 minutes before slicing. For 100 calorie portions, slice casserole into 36 sections by cutting 4 rows by 9 rows.
Perfect Portion Baked Mac & Cheese
Serving size: 1/36 baked mac & cheese Calories: 100

 [/fusion_builder_column][/fusion_builder_row][/fusion_builder_container]
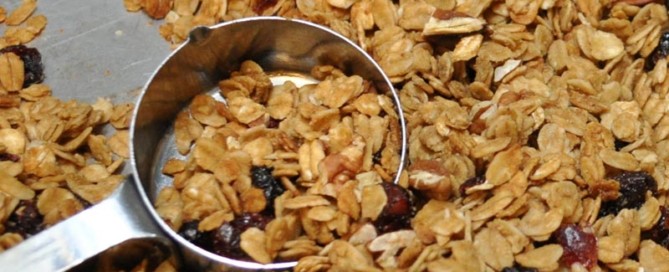
Homemade Granola

We’ve packed our granola with whole-grain oats, pecans, raisins, spices, and a small amount of brown sugar and oil for a fortified, absolutely delicious on-the-go snack. Also, thanks to its great crunch, its just as satisfying as a yogurt or even ice cream topping.

Homemade Granola
 
Prep time
Cook time
Total time
 
Author:
Recipe type: Satisfying Snacks
Makes: 20 Topping or 10 Snack portions
Ingredients
  • 2 ½ cups old-fashioned rolled oats
  • ½ cup chopped pecans
  • 2 tablespoons light brown sugar
  • 1 teaspoon ground cinnamon
  • ¼ teaspoon salt
  • ¼ cup honey
  • 1 tablespoon canola oil
  • 1 cup raisins
Directions
  1. Preheat the oven to 300°F, and line a sheet pan with parchment paper.
  2. In a large mixing bowl, toss together the oats, pecans, brown sugar, cinnamon, and salt.
  3. In a separate bowl, whisk together the honey and canola oil, and then pour over the oat mixture, tossing to evenly coat.
  4. Spread the coated granola on the prepared sheet pan in a thin layer, and bake for 40 minutes, stirring every 10 minutes.
  5. Let the granola cool for at least 15 minutes before tossing with raisins to serve. Store in an airtight container for up to 10 days.
Perfect Portion Homemade Granola

HELPFUL TIP: Any combination of dried fruit can be used in place of the raisins, though nutritional information provided is for 1 cup (unpacked) of raisins.
Serving size: 3 tbsp Calories: 100

 [/fusion_builder_column][/fusion_builder_row][/fusion_builder_container]

Title

Go to Top